


Add a hover-based tab interaction in Webflow with one simple JavaScript snippet. Learn how to make your tabs change on hover for a smoother, more engaging user experience.
<script>
  document.addEventListener("DOMContentLoaded", function () {
    const tabLinks = document.querySelectorAll('.w-tab-link');

    tabLinks.forEach(link => {
      link.addEventListener('mouseenter', () => {
        link.click(); // triggers the tab change on hover
      });
    });
  });
</script>
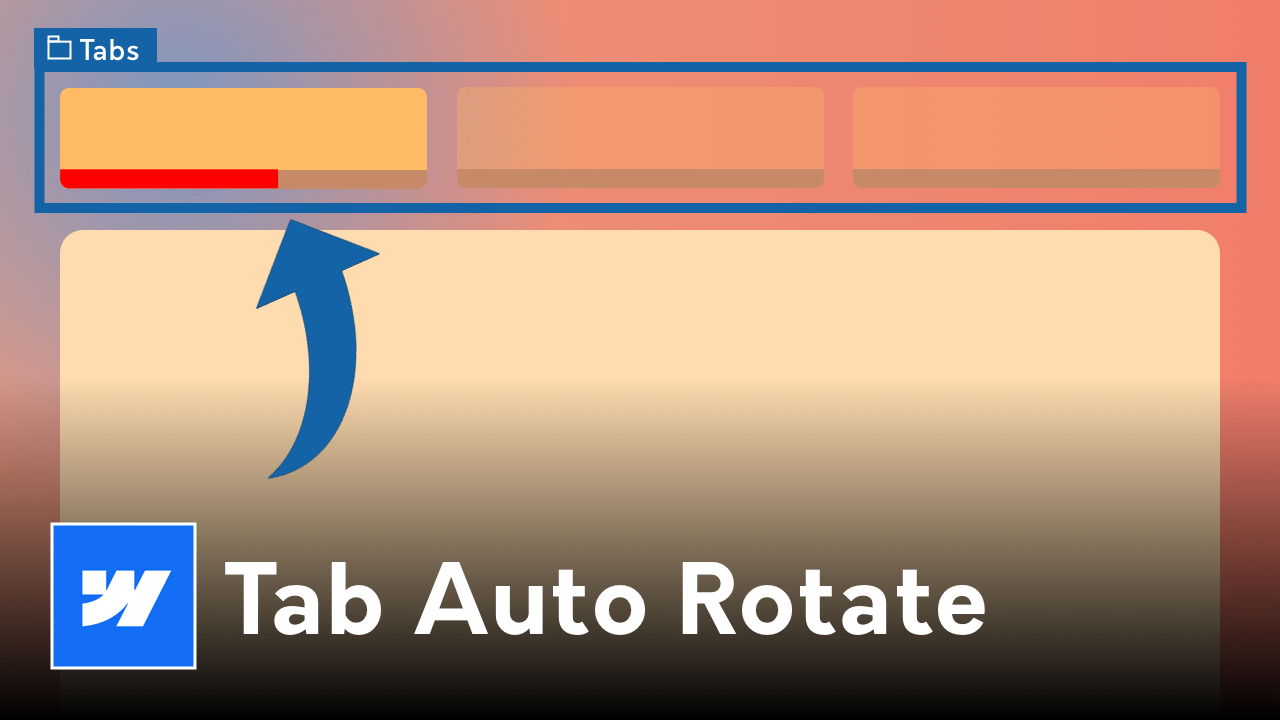
If you’ve ever wanted your Webflow tabs to switch automatically when a user hovers over them, instead of having to click, this quick tutorial shows you exactly how to do it.
This simple JavaScript snippet enhances your site’s interactivity and user experience — perfect for portfolio sections, product showcases, or feature tabs.
By default, Webflow tabs change when a user clicks on a tab link. While that’s great for clarity, hover-based tab changes can feel more dynamic and engaging — especially for visual layouts where you want visitors to explore content quickly.
Hover interactions are particularly effective for:
It reduces friction and adds an instant, modern feel to your design.
Simply paste the following script inside your Page Settings → Before </body> tag, or inside an Embed element at the bottom of your page.
<script>
document.addEventListener("DOMContentLoaded", function () {
const tabLinks = document.querySelectorAll('.w-tab-link');
tabLinks.forEach(link => {
link.addEventListener('mouseenter', () => {
link.click(); // triggers the tab change on hover
});
});
});
</script>
Here’s what the script does, step by step:
DOMContentLoaded event ensures the code only runs once all tab elements are available..w-tab-link class targets your default Webflow tab buttons.mouseenter event triggers whenever a user hovers over a tab.link.click() line activates the tab just like a normal click, but instantly on hover.That’s it — no extra libraries or complex code needed.
While this script doesn’t directly change your SEO, improving interactivity and engagement can help reduce bounce rate and increase dwell time, both positive signals for search performance.
By making your tab sections more intuitive and faster to explore, you’re encouraging users to stay longer and interact more — which Google loves.
Adding a tab hover effect in Webflow takes less than a minute but can dramatically improve the flow of your site. Whether you’re showing off your latest work or comparing features side by side, this quick code snippet gives your design a polished, professional touch.
