User / Level Icon
Intermediate
Gear Time Icon
Webflow
Time Icon
9
 Minutes

How to Install an AI Chatbot in Webflow (2026 No-Code Guide)

Learn how to install an AI chatbot that crawls your Webflow site to provide 24/7 automated support. Step-by-step no-code guide for 2026.

Copy Code
In 2026, a static website isn’t enough. Clients want automation, and visitors want instant answers. Adding an AI chatbot that actually crawls your site to provide accurate, real-time support is one of the highest-value upgrades you can offer as a Webflow developer.

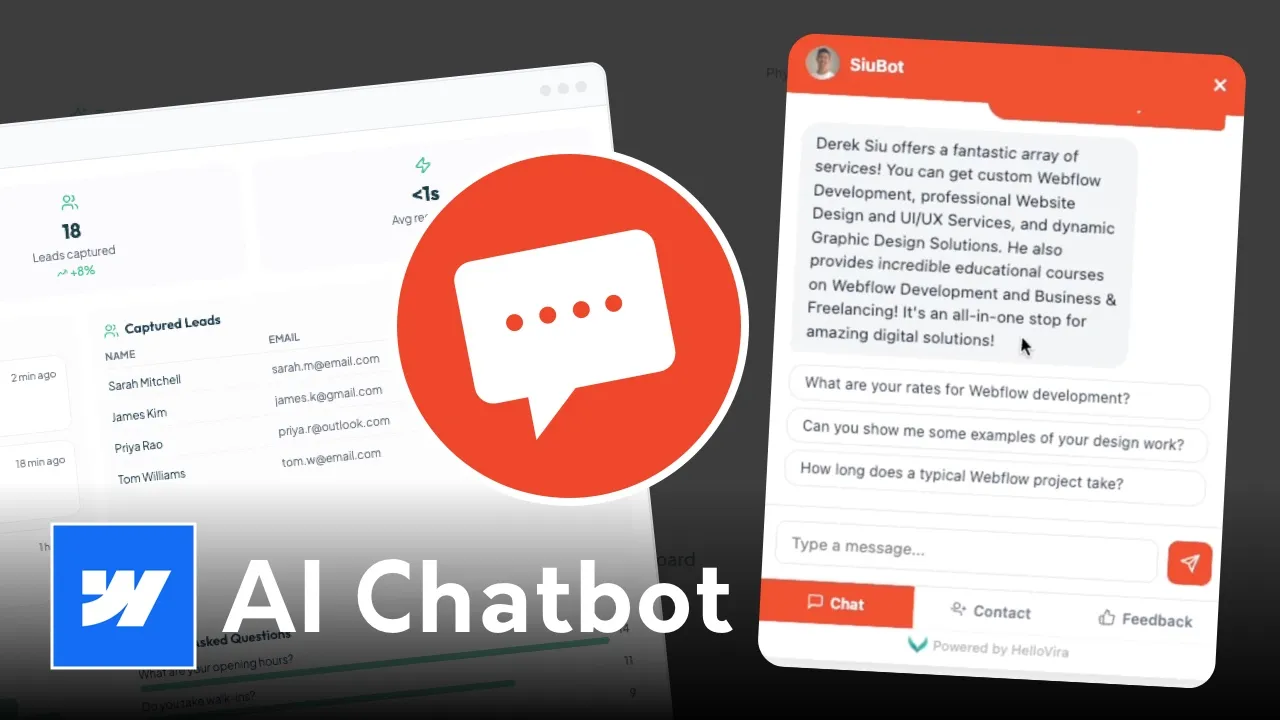
In this guide, we’re looking at how to integrate an AI assistant using HelloVira—a tool that learns your content automatically so you don’t have to manually program every response.

Why Use a Site-Crawling AI?

Standard chatbots rely on rigid "if-this-then-that" logic. Site-crawling AI is different because it:

  1. Reads your CMS: It understands your blog posts, services, and FAQ pages.
  2. Saves Time: You don't need to write scripts; the AI handles the data.
  3. Captures Leads: It engages users 24/7, even while you’re asleep.

Meet HelloVira: The AI Assistant Built for Small Business

While there are dozens of chatbot platforms on the market, most are built for enterprise teams with massive budgets. HelloVira is different. It’s specifically designed for service-based businesses—like health clinics, salons, and law firms—that need a professional AI assistant without the $400/month price tag.

What Makes HelloVira Different?

The biggest hurdle with most chatbots is the setup time. You usually have to manually "feed" the bot every single question and answer. HelloVira flips the script:

  • Zero-Effort Learning: You simply paste your website URL, and HelloVira’s AI automatically crawls your site. It learns your services, pricing, opening hours, and FAQs in seconds.
  • Automatic Lead Capture: It doesn’t just answer questions; it turns anonymous visitors into warm leads by capturing names and emails directly in the chat flow.
  • Built-in Business Intelligence: Your dashboard shows you exactly what customers are asking most, giving you real insights into what your audience actually wants.
  • Brand Matching: You can fully customize the bot’s name, avatar, colors, and personality tone so it feels like a native part of your Webflow design.

HelloVira vs. The Competition

When you compare HelloVira to enterprise tools like Podium or Intercom, the value is clear:

Feature Podium Intercom HelloVira
Monthly Price $399+ $100+ $29
Auto-learns from Site
Setup Time Days Days 5 Minutes
Lead Dashboard

How to Get Started

Setting up HelloVira is a three-step process that takes less than five minutes:

  1. Paste your URL: Let the AI scrape your business info automatically.
  2. Personalize: Choose your bot’s "vibe" and branding.
  3. Go Live: Copy the one-line embed code and paste it into your Webflow Project Settings.
Special Offer: You can lock in the Founding Member rate of $29/month (before it rises to $39/month on May 1) and try the platform completely free for 14 days.

👉 Start your 14-day free trial at HelloVira.com

Step-by-Step: Installing HelloVira in Webflow

1. Training the AI


Before you touch Webflow, you need to give your bot a "brain." In the HelloVira dashboard, you simply enter your website URL. The AI will crawl your pages and build a knowledge base based on your actual site content.

2. Customizing the Widget

You can style the chat bubble to match your brand colors. Since we’re all about high-end UI/UX, make sure your brand hex codes are ready so the bot looks like a native part of your design.

3. Adding the Custom Code

Webflow makes this easy. You don’t need to be a coder; you just need to know where to paste the snippet:

  • Go to your Project Settings.
  • Click on the Custom Code tab.
  • Paste your HelloVira script into the Footer Code section.
  • Hit Save and Publish.

Best Practices for Chatbots

To ensure your chatbot doesn't hurt your site performance or user experience, follow these rules:

  • Positioning: Ensure the bubble doesn't cover important mobile navigation or "Back to Top" buttons.
  • Padding: Use pointer-events: none on overlays if you are building a custom trigger.
  • Testing: Always check your site on a staging domain first to ensure the script initializes correctly across all breakpoints.

Final Thoughts

Adding AI to your Webflow toolkit allows you to charge more for your projects and provide a better result for your clients. It’s no longer about just building a site; it’s about building a system.

Ready to try it out? You can try HelloVira free for 14 days to see how it handles your site content: https://hellovira.com/

Frequently Asked Questions

How do I add an AI chatbot to Webflow without coding?

The easiest way to add an AI chatbot to Webflow is by using a specialized no-code platform like HelloVira. You simply generate a Javascript embed snippet from the chatbot dashboard and paste it into the Footer Code section of your Webflow Project Settings. This allows the bot to initialize sitewide without you having to write any custom functions.

Can an AI chatbot automatically learn from my Webflow site content?

Yes. Modern AI chatbots utilize site-crawling technology to scan your Webflow CMS, static pages, and blog posts. Once you provide your URL, the AI indexes your content to create a knowledge base, allowing it to answer specific questions about your business, pricing, or services with high accuracy and zero manual programming.

Does adding a chatbot script slow down my Webflow site?

If installed correctly in the Footer Code, the impact on your PageSpeed scores is minimal because the site content loads before the script initializes. To maintain optimal performance, avoid using multiple heavy tracking scripts and ensure your chatbot provider uses a lightweight CDN to deliver the chat widget.

Will a Webflow AI chatbot work on mobile devices?

Absolutely. Most AI chatbot widgets are fully responsive and designed to scale down for mobile breakpoints. When setting it up in Webflow, ensure the chat bubble doesn't overlap with essential mobile UI elements like your "Back to Top" button or navigation bars to ensure a seamless user experience.

Can I customize the chatbot's appearance to match my Webflow brand?

Yes, high-end tools allow for full UI customization. You can adjust the primary colors, typography, and icon styles to match your Webflow project's design system. This ensures the chatbot looks like a native feature of your website rather than a third-party plugin, which helps maintain brand trust and authority.
Have Any Further Questions?
I'm Always Down To Help.
Contact Me